Hey there! As a C purlin supplier, I've seen firsthand how crucial it is to get the installation of C purlins on a sloped roof right. It's not just about nailing or screwing them in; it's a process that requires attention to detail, the right tools, and a good understanding of the roof's structure. In this blog, I'll walk you through the step - by - step process of installing C purlins on a sloped roof.
What are C Purlins?
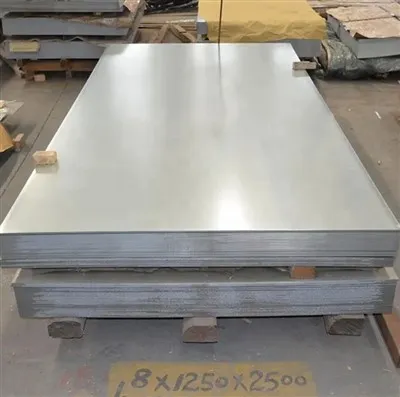
Before we dive into the installation process, let's quickly talk about what C purlins are. C purlins are structural components commonly used in construction, especially in roofing and wall systems. They are made of steel and have a C - shaped cross - section. This shape gives them excellent strength and stability, making them ideal for supporting the roof covering on a sloped roof. There are also related products like Steel Z Purlins, C Section Steel Channel, and Slotted U Channel which can be used in combination with C purlins depending on the project requirements.
Tools and Materials You'll Need
- Tools:
- Measuring tape: To measure the length and spacing of the purlins accurately.
- Drill: A good quality drill is essential for making holes and driving screws.
- Screwdriver or nut driver: Depending on the type of fasteners you use.
- Level: To ensure the purlins are installed straight.
- Safety equipment: This includes safety glasses, gloves, and a hard hat.
- Materials:
- C purlins: Make sure you have the right size and thickness for your roof.
- Fasteners: Screws or bolts that are suitable for the type of roof and purlin material.
- Washers: To distribute the load and prevent damage to the purlins.
Step 1: Prepare the Roof Structure
The first step is to make sure the roof structure is ready for the installation of C purlins. Check the rafters or trusses for any damage or weakness. If there are any issues, repair or replace the damaged parts before proceeding. Measure the distance between the rafters or trusses to determine the spacing of the purlins. The spacing will depend on the load requirements and the type of roof covering. Generally, the spacing can range from 16 inches to 24 inches.
Step 2: Measure and Cut the C Purlins
Once you have determined the spacing, measure and cut the C purlins to the appropriate length. Use a measuring tape to mark the length on the purlin and a saw to make the cut. Make sure the cuts are straight and clean. You can also pre - drill holes in the purlins at the locations where they will be attached to the rafters or trusses. This will make the installation process faster and easier.
Step 3: Position the First Purlin
Start by positioning the first C purlin at the bottom of the sloped roof. Use a level to ensure it is straight and parallel to the eave of the roof. Mark the locations where the purlin will be attached to the rafters or trusses. If you pre - drilled holes, align them with the marks on the rafters or trusses.


Step 4: Attach the First Purlin
Using the appropriate fasteners and washers, attach the first purlin to the rafters or trusses. Start at one end and work your way to the other end. Make sure the fasteners are tightened securely, but don't over - tighten them as this can damage the purlin or the roof structure.
Step 5: Install the Remaining Purlins
Repeat steps 3 and 4 for the remaining purlins. Make sure the purlins are evenly spaced and parallel to each other. You can use a string line to ensure the alignment of the purlins. As you install each purlin, check its level and alignment to make sure it is straight.
Step 6: Check for Alignment and Stability
Once all the purlins are installed, check the alignment and stability of the entire system. Use a level to check if the purlins are still straight and a plumb bob to check the vertical alignment. Make any necessary adjustments to the fasteners or the position of the purlins.
Step 7: Consider Additional Support
In some cases, you may need to add additional support to the C purlins. This can be done by installing bracing or by using additional purlins in areas with higher load requirements. For example, if your roof is going to support heavy snow loads or if it has a large span, additional support may be necessary.
Step 8: Install the Roof Covering
After the C purlins are installed and checked for stability, you can proceed with installing the roof covering. This can be shingles, metal roofing, or any other type of roofing material. Make sure to follow the manufacturer's instructions for installing the roof covering on the C purlins.
Tips and Tricks
- Safety First: Always wear the appropriate safety equipment when working on a sloped roof. It's better to be safe than sorry.
- Check the Weather: Avoid installing C purlins in bad weather conditions, such as rain or high winds. This can make the installation process dangerous and may affect the quality of the installation.
- Use the Right Fasteners: Make sure you use fasteners that are suitable for the type of roof and purlin material. Using the wrong fasteners can lead to problems down the road.
Conclusion
Installing C purlins on a sloped roof is a process that requires careful planning and attention to detail. By following the steps outlined in this blog, you can ensure a successful installation. Remember, if you have any questions or need more information about C purlins or their installation, don't hesitate to reach out. We're here to help you with all your C purlin needs. Whether you're a contractor working on a large - scale project or a DIY enthusiast building your own home, we have the right products and expertise to assist you. So, if you're in the market for high - quality C purlins, get in touch with us for a consultation and let's start working on your project together.
References
- Construction Handbook for Metal Roofing Systems
- Steel Structural Design Guide for Residential and Commercial Buildings